• Welcome to For E Bodies Only !

    We are a community of Plymouth Cuda and Dodge Challenger owners. Join now! Its Free!

'73 Challenger Rallye Restoration

Bill

Well-Known Member
Joined
Oct 6, 2012
Messages
593
Reaction score
55
Location
Vermont

challenger6pak

Well-Known Member
Joined
Feb 27, 2011
Messages
4,068
Reaction score
917
The outside gasket looks a lot like a carb air horn gasket. You can go without it. Just don't overtighten the fliptop screws.
 

Bill

Well-Known Member
Joined
Oct 6, 2012
Messages
593
Reaction score
55
Location
Vermont
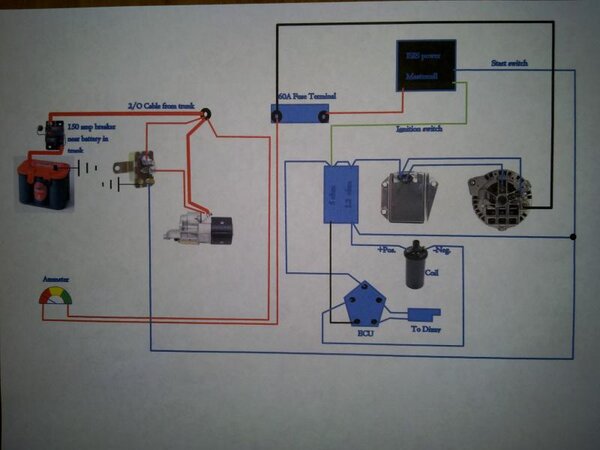
I just drew this ignition wiring up system up utilizing my ISIS power system. Was wondering if anyone can see any problems with the way this looks before I let the smoke out. 035.jpg

035.jpg
 

Bill

Well-Known Member
Joined
Oct 6, 2012
Messages
593
Reaction score
55
Location
Vermont
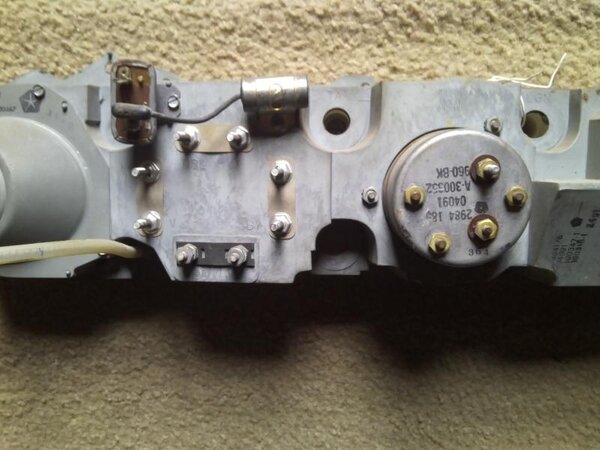
There are 5 terminals on the tachometer on my Rallye gauge cluster. Was wondering if anyone had a road map of where these terminals go to? I have a manual but all I am getting is what color wire goes where. Color means nothing to me. I need to know where the wires wind up going to on the other end or an explanation of where they go or what they do. 001.jpg

001.jpg
 

Bill

Well-Known Member
Joined
Oct 6, 2012
Messages
593
Reaction score
55
Location
Vermont
There are 5 terminals on the tachometer on my Rallye gauge cluster. Was wondering if anyone had a road map of where these terminals go to? I have a manual but all I am getting is what color wire goes where. Color means nothing to me. I need to know where the wires wind up going to on the other end or an explanation of where they go or what they do. View attachment 20468

Never mind. I think I "Googleboxed" it enough to figure it out myself. One side to coil negative and other to constant positive along with cig lighter/glovebox, etc. Three are not used for electrical connections. It's an adventure not ever doing this before and purchasing the car torn apart with previous owner not labeling things all that well.
 
Last edited:

moparleo

Well-Known Member
Joined
Oct 17, 2011
Messages
7,097
Reaction score
1,881
Location
So. Cal. Riverside area Moreno Valley
Bill Only the 2 terminals with the fiber washer are electrical connections. The top, or long post is for 12V power, the other to "-" coil. Is your cluster from a 73 or later ? if not the tach will not work.

By the time I hit the post button, I see that you figured it out. Just slow on then draw today.
 

Bill

Well-Known Member
Joined
Oct 6, 2012
Messages
593
Reaction score
55
Location
Vermont
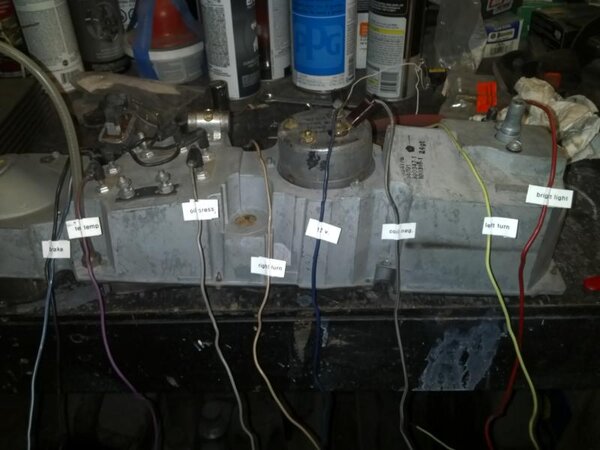
I was rummaging through some wire rats nests and discovered that it was me that actually removed the wires from the gauge cluster over 2 years ago and I did label where the different wires go. It is amazing how important it is to label things when you take them off. 002.jpg

002.jpg
 

74chlngrTT5.9

Well-Known Member
Joined
Feb 27, 2013
Messages
278
Reaction score
23
Location
SoCal
I was rummaging through some wire rats nests and discovered that it was me that actually removed the wires from the gauge cluster over 2 years ago and I did label where the different wires go. It is amazing how important it is to label things when you take them off. View attachment 20469

I agree with this post...
 

Bill

Well-Known Member
Joined
Oct 6, 2012
Messages
593
Reaction score
55
Location
Vermont
Bill Only the 2 terminals with the fiber washer are electrical connections. The top, or long post is for 12V power, the other to "-" coil. Is your cluster from a 73 or later ? if not the tach will not work.

By the time I hit the post button, I see that you figured it out. Just slow on then draw today.

Thanks Leo!
Mine is a 73 vintage. Curious why you say some years will not work? My 74 parts car has standard gauge cluster.
 

Bill

Well-Known Member
Joined
Oct 6, 2012
Messages
593
Reaction score
55
Location
Vermont
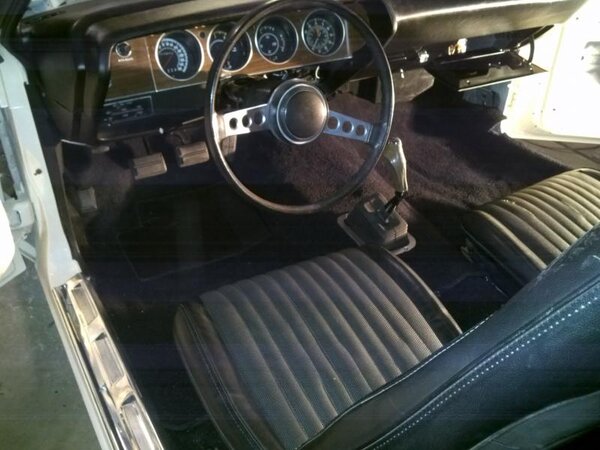
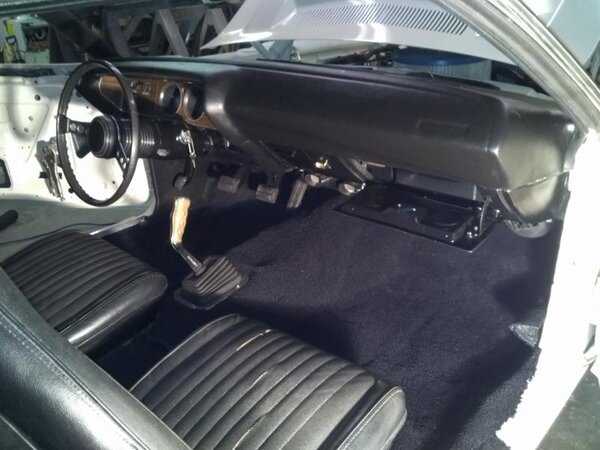
Thanks Leo. I was just curious. Car is pretty much all wired up with the Infinitybox multiplex system. Put dash pad cover on. Looks very nice. Recommend using a lot of clamps if the dash pad is not installed in the car. I can see that if the dash pad is installed in the car there are a lot of things that hold it in place along with being able to use rolls of paper towels in between the dash pad cover and the windshield while the silicone adhesive dries. 032.jpg033.jpg034.jpg

032.jpg


033.jpg


034.jpg
 
Last edited:

Bill

Well-Known Member
Joined
Oct 6, 2012
Messages
593
Reaction score
55
Location
Vermont
Been a long time Leo. Still a lot to do. I'm having problems figuring out the routing of the speedometer cable? Does anyone have any pictures? Seems like any way I try there is something that is in the way especially with the clutch pedal. Also, I turned the glove box key to the lock position and it will not go back to the unlocked position. Tried WD-40, tapping it but won't get out of the lock position with the key. I have a local locksmith that is about 75 years old. I may try him. If the local locksmith was in his 20' or 30's they would tell me to push the "On Star" button (LOL)
 
Last edited:

Bill

Well-Known Member
Joined
Oct 6, 2012
Messages
593
Reaction score
55
Location
Vermont
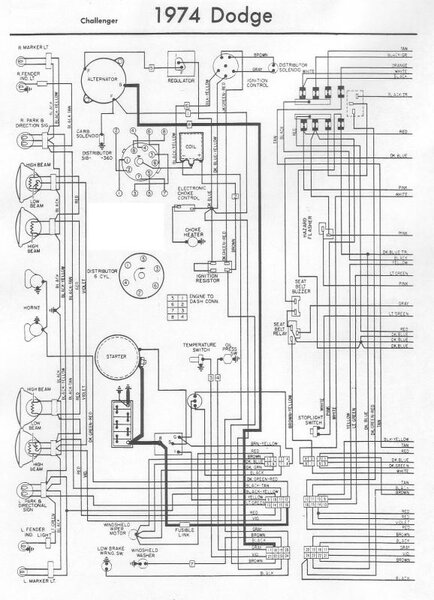
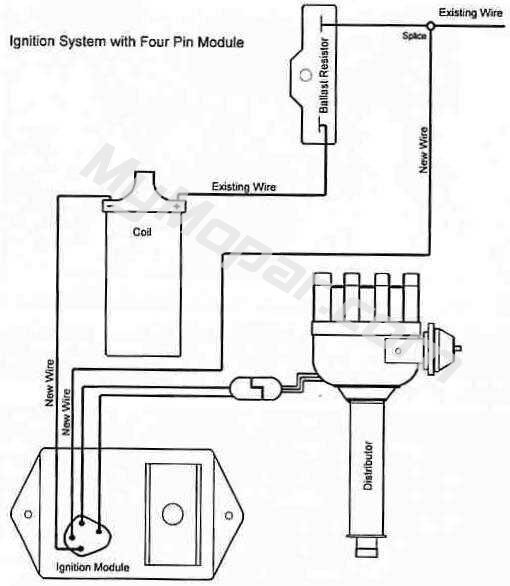
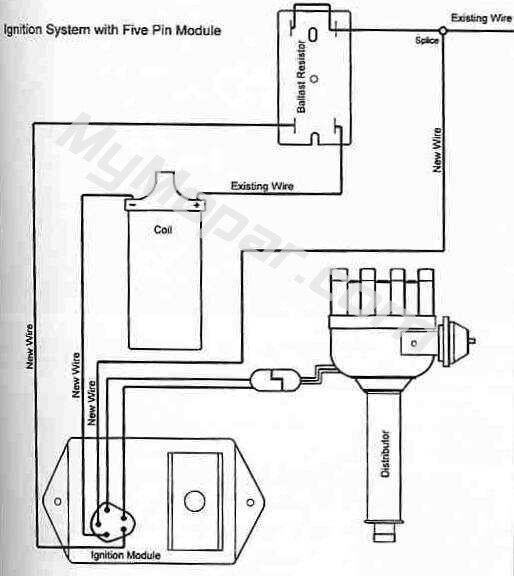
I wired my engine area this way for a 5 wire ECM (picture below). I ordered a new ECM and it is a 4 wire. I am using the dual ballast resister.The instruction state:
"AVISO" 5 espigas frente a 4 espigas: todos los modulos de..... OOPS... wrong language.

Lets try this.

"AVIS" Mise a la masse: Ce module est...... Darn it... wrong language again!!

Lets try this one.

"NOTICE"
5-pin vs. 4 pin: All Replacement modules for Chrysler applications have 4-pin connectors. Early O.E. modules had 5 pins while current Chrysler production also has 4 pins. THe New 4- pin modules are correct replacements for both O.E. types (except Dodge Trucks with heavy duty emissions cycle carburetor with electronically controlled vacuum kicker).

I just drew this ignition wiring up system up utilizing my ISIS power system. Was wondering if anyone can see any problems with the way this looks before I let the smoke out.View attachment 20207
 
Last edited:

Bill

Well-Known Member
Joined
Oct 6, 2012
Messages
593
Reaction score
55
Location
Vermont
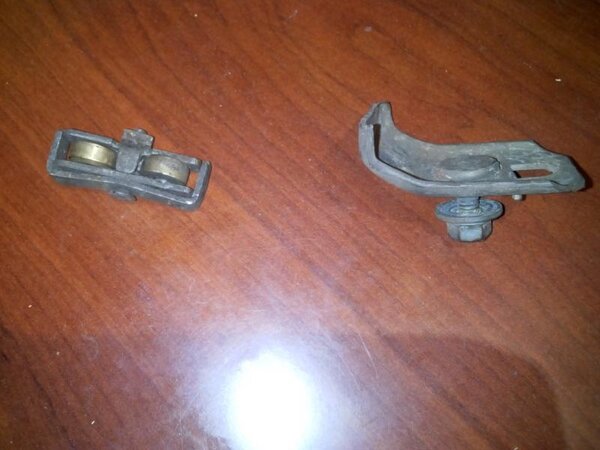
Hey there everybody! Again, purchasing my project in parts and pieces does not allow me to know what goes where sometimes. Was wondering if anyone can help out by telling me what the function is of these parts. I know where the one on the right gets mounted but it does not seem to do anything??? Just sits there. I imagine it is some kind of stop but it isn't stopping anything? The item on the left I have no clue what it is or what it's function is. I have a few of them. Thanks for your help and happy summer.016.jpg

016.jpg
 

Bill

Well-Known Member
Joined
Oct 6, 2012
Messages
593
Reaction score
55
Location
Vermont
I wired my engine area this way for a 5 wire ECM (picture below). I ordered a new ECM and it is a 4 wire. I am using the dual ballast resister.The instruction state:
"AVISO" 5 espigas frente a 4 espigas: todos los modulos de..... OOPS... wrong language.

Lets try this.

"AVIS" Mise a la masse: Ce module est...... Darn it... wrong language again!!

Lets try this one.

"NOTICE"
5-pin vs. 4 pin: All Replacement modules for Chrysler applications have 4-pin connectors. Early O.E. modules had 5 pins while current Chrysler production also has 4 pins. THe New 4- pin modules are correct replacements for both O.E. types (except Dodge Trucks with heavy duty emissions cycle carburetor with electronically controlled vacuum kicker).

After research it seems that a 4 pin will work in place of a 5 pin. Just bolt it on and should be good to go. It winds up only using one resistor from the dual ballast resistor.
 

moparleo

Well-Known Member
Joined
Oct 17, 2011
Messages
7,097
Reaction score
1,881
Location
So. Cal. Riverside area Moreno Valley
Bill, I gave you that link because you could scan back and forth to get more diagrams. I don't know about this part on the left, but the part on the right looks like either a window stop or a window guide that is missing the fuzz that is normally glued on.
 

challenger6pak

Well-Known Member
Joined
Feb 27, 2011
Messages
4,068
Reaction score
917
The part on the right is part of a window guide. They keep the glass from rattling and moving back and forth in the door.
 
Back
Top